Pre-requisites: Microsoft Office SharePoint Server 2007, Visual Studio 2005 with Webpart extensions installed.
The aim of the post is not to build a complex webpart, instead, the way to develop and deploy webparts to SharePoint Site. Here, I am going to show, how a feedback data can be submitted from a webpart. In one of my posts, I have explained about submitting the data through InfoPath form and it is the same thing here. The final webpart looks similar to the below image.
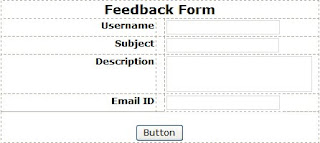 In order to achieve this, we need to follow the below steps:
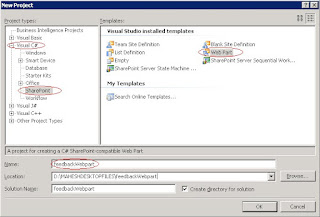
Step 1: In Visual Studio 2005 as mentioned in the pre-requisites, in which Webpart extensions were installed, Create a New Project -> Select Visual C# in Project Types and then Select SharePoint in the extended tree by clicking + icon and then select Webpart template in the templates section, give the name eg., feedbackwebpart to your webpart and then click OK.
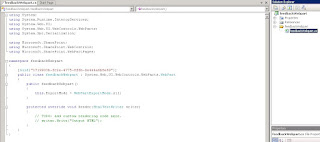
 Step 2: Now you will be seeing the editor in which feedback.cs file will be opened, if it is not opened, then double click feedback.cs from the solution explorer.
If you look into the code, the default code will be having the sharepoint namespaces already mentioned and also the SharePoint DLL added as references, and in the code you can see that the render method has been placed with comments.
For any webpart, to be deployed into SharePoint Sites, we need basically two methods. They are: Child Controls and Render methods.
Child Controls method is for declaring all the controls that will be used in the webpart, such as Labels, Textboxes, etc.,
Render method is for rendering all the controls in the sharepiont site.
Initially, instead of implementing the code completely, we will follow the baby steps to achieve this.
First of all, I will deploy the very first part of the webpart ie.,

Because, the webpart once deployed, through this webpart extensions installed in the Visual Studio 2005, will be easy and doesn't require any dll placing or safecontrols adding in web.config files. Everything will be taken care by the Deploy process only. Hence we will first achieve to deploy the first part of the webpart as mentioned above.
Step 3: In order to achieve the first part, we need a table and a row and a column and along with it, one label.
- Firstly we will declare the Label variable inside the main class as follows:
Label lblformHeader;
- Then in the Child Controls method we have define the Label control, so that it can be used in the Render method.
{
Label lblformHeader = new Label();
lblformHeader.ID = "lblformHeader";
lblformHeader.Text = "Feedback Form";
this.Controls.Add(lblformHeader);
}
- Now that, as we have defined Label for form header, we can render that control. So, we can now use the code in the render method as follows:
{
writer.Write("
| "); lblformHeader.RenderControl(writer); writer.Write(" |
}
- Now we have to go to the properities page of the project by right clicking on the project name in the Solution explorer and then select Properities and in the Properities windown make sure that in the Debug section, Start Browser with URL should be your Site where you want to deploy the webpart. And also make sure that in the Signing section, you select signing Key if it does not exists for strong naming the assembly.
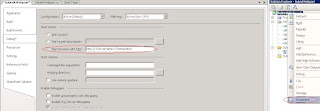
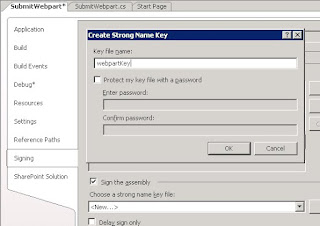
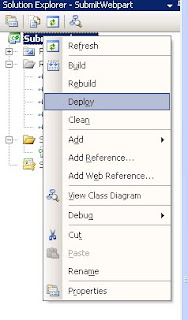
Thats it you are now done with the first part. Now that, you only need to deploy the Solution by right clicking on the project and selecting Deploy. As shown below.
 Once, the deployment was done, successfully, you will need to add the webpart in the desired location of your mentioned site from Edit page option in your sharepoint site. You will be seeing the first part in your site as follows:
 Now that, as we had the first part, we will now write the code to achieve the complete design as below:
Follow the below steps, to achieve this:
- Firstly we will declare the variables inside the main class for the rest of the controls that has to be placed in the webpart as done previously: The code declaring the variables as a whole looks like this:

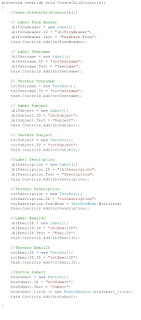
- Secondly declaring the Child Controls. And the code as a whole, looks as follows:
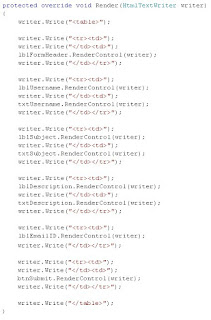
- Next comes the part of Render method. The code as a whole looks like this:
- And finally comes to Button Click Event handler.
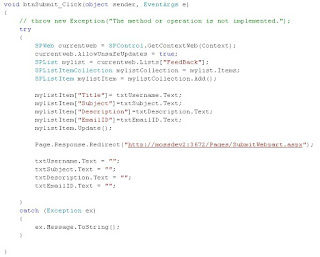 Now run the code by clicking on F5 or right click the project and select Deploy.
And thats it, you are done. Your final webpart looks like this:
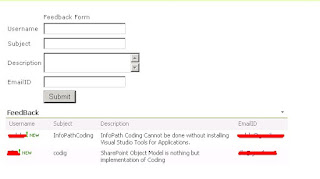
This, completes the webpart deployment.
Enjoy the coding. Will catch you soon in my next blog.
No comments:
Post a Comment
Please Leave Your Comments Here On This Post.....